


Learn how to do chaturanga dandasana to protect your body from injury and grow stronger in your yoga practice.
When I was in college, I began attending weekly vinyasa yoga classes that included sweaty sun salutations and challenging flows. These fast-paced classes transition into poses using the breath, which allows little time for instructors to explain proper alignment. This can leave joints like the shoulders and wrists vulnerable to injury, especially when weight-bearing in poses like chaturanga dandasana.
It wasn’t until I began slowing down my yoga practice and studying anatomy that I felt confident in the technique of the pose.
Learning how to develop our mind-body connection, stay in alignment and engage our muscles allows us to safely practice yoga for many years to come.
What is chaturanga dandasana?
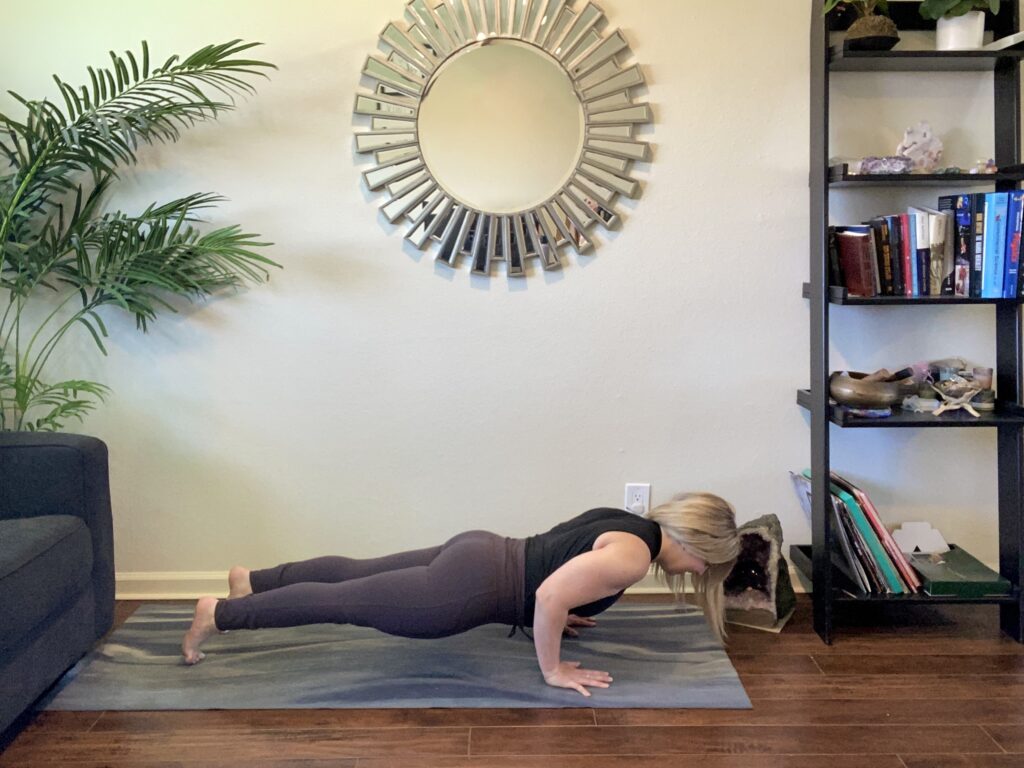
Chaturanga dandasana, also known as four-limbed staff pose or low plank, is a foundational yoga posture that provides a transition between plank and upward facing dog. When practiced with mindful alignment, chaturanga builds strength and stability in the arms, core, shoulders and wrists, and helps prepare for arm balances and inversions.
How to do chaturanga dandasana with proper form
I filmed a video tutorial below to learn alignment cues and modifications for chaturanga dandasana. I recommend having a strap to help you practice lowering down. When you are ready, press play on the video below. Make sure you are cleared by your doctor before exercising and always listen to your body.
Here is a breakdown of cues for you to try:
1. Start in plank pose
- Align your hands under your shoulders and spread your fingers wide
- Place your feet hip-width apart
- The balls of your feet should be aligned with your ankles
- Engage your core and thigh muscles. This will help ensure you are not putting additional pressure on the joints
2. Shift forward slightly
- Come onto the tips of your toes so your shoulders go slightly past wrists. This prevents sinking and helps engage the stabilizing muscles
3. Lower half way down slowly
- Hug your elbows in toward your ribs, rather than allowing them to flare out toward the sides. This protects your shoulder joints and helps build strength
- Lower until your elbows are at a 90-degree angle or less. Avoid dropping too low, as that compresses the shoulder joints
- Keep your body in one straight line (including your head, neck and hips)
- Keep your chest broad and collarbones wide
Modifications to build strength
- Use a strap: make a loop with a strap that measures the distance between your shoulders. Place your arms in the loop and slide the strap just above your elbows. Then practice lowering down from plank to chaturanga. The strap will serve as a shelf to prevent you from lowering down too far
- Use your knees: place your knees on the mat in plank pose and then lower into chaturanga. This helps support your weight as you build strength in your upper body
- Use your fists or forearms: if you are experiencing any wrist tension or pain, make fists with your hands or come onto your forearms, instead of having your palms on the mat
As a yoga instructor, I notice many students rushing through chaturanga or using the pose as an excuse to show off their push-up abilities, but quality is more important than quantity. I encourage you to listen to your body, move mindfully and build muscle memory with this pose.
I’d love to support you in your yoga practice. I offer one-on-one virtual and in-person sessions. Send me in an email at shannonkyeager@gmail.com or fill out the contact form on my website. I look forward to flowing together!
With aligned strength,
Shannon

+ show Comments
- Hide Comments
add a comment